
To update your name servers on Squarespace, follow these steps:
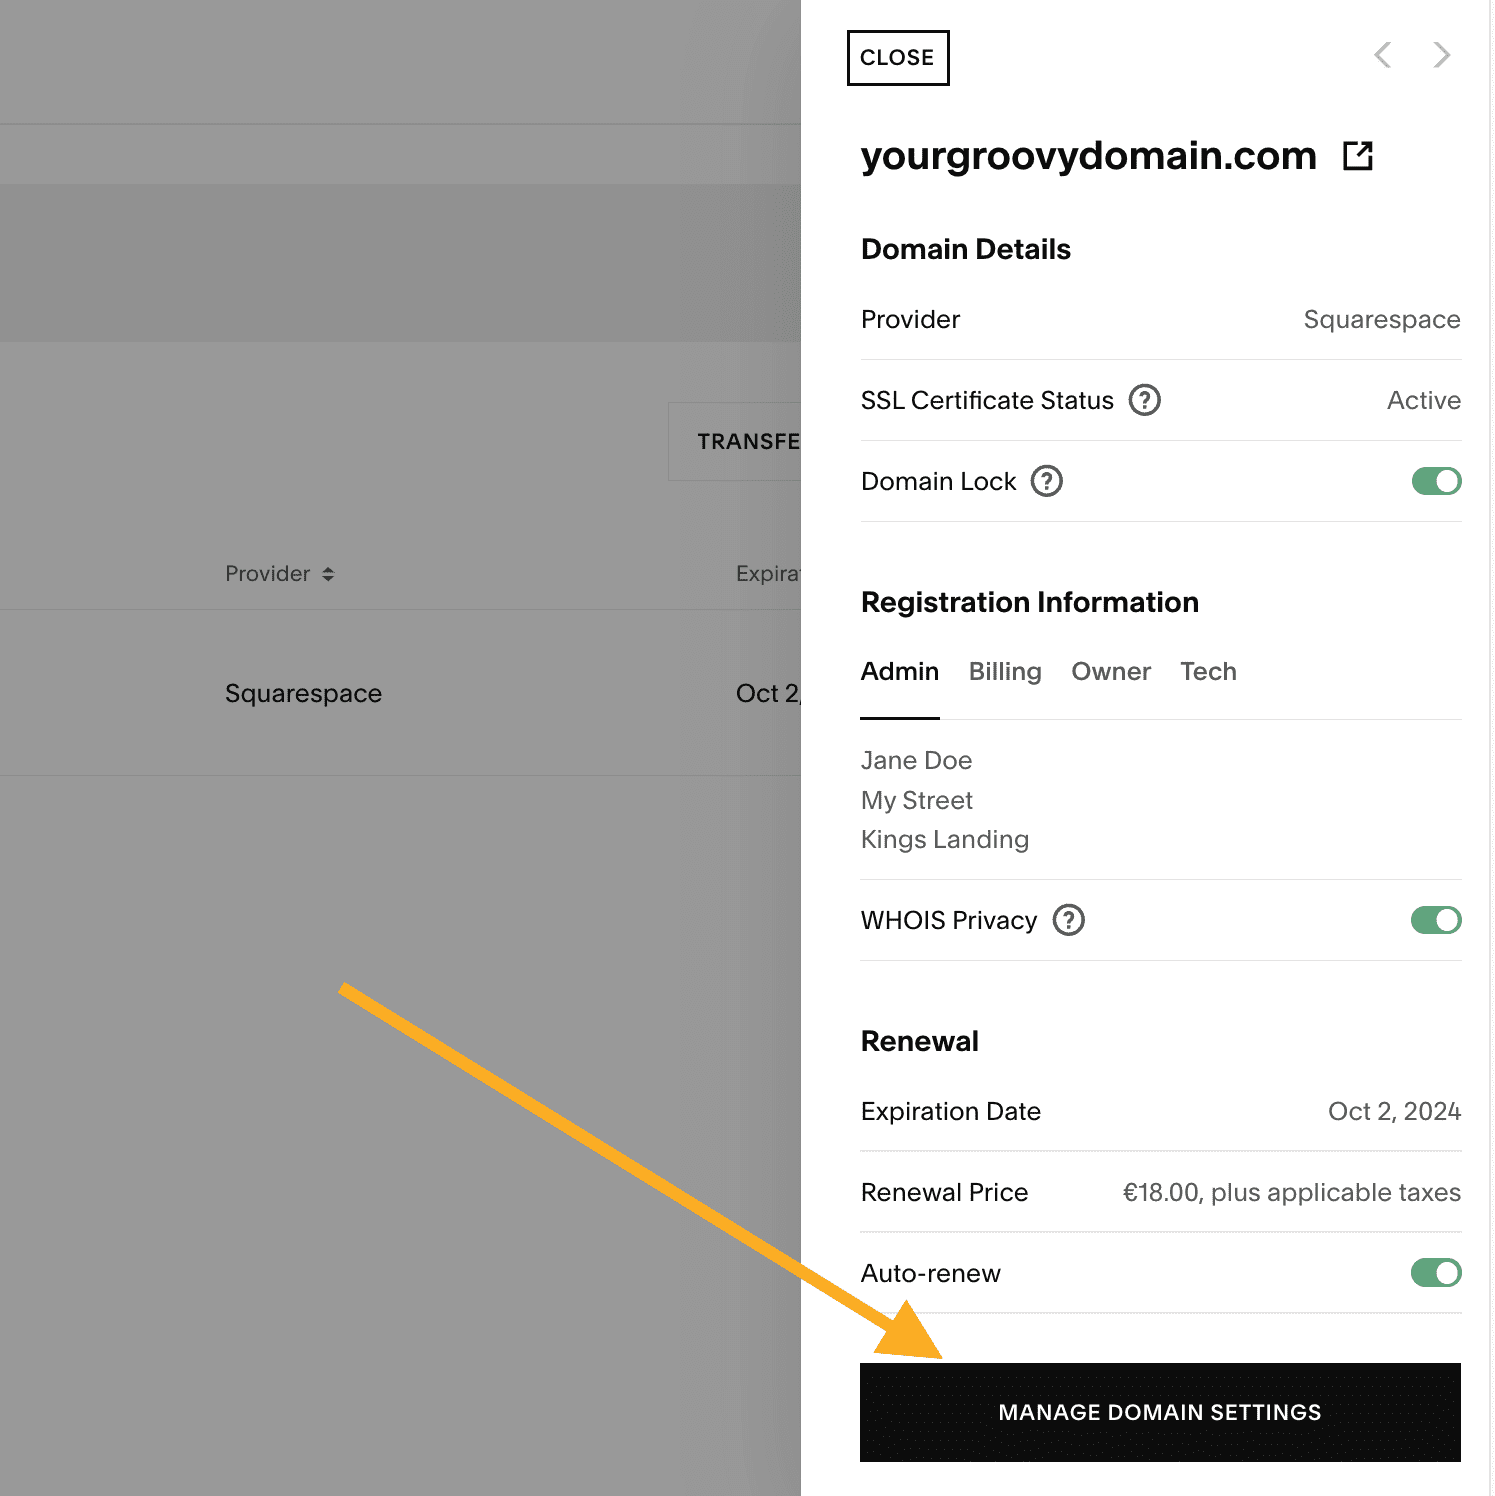
- Log into your Squarespace Domain Dashboard.
- Select your domain from the list. This will load more options.
- Click on the “Manage Domain Settings” button:
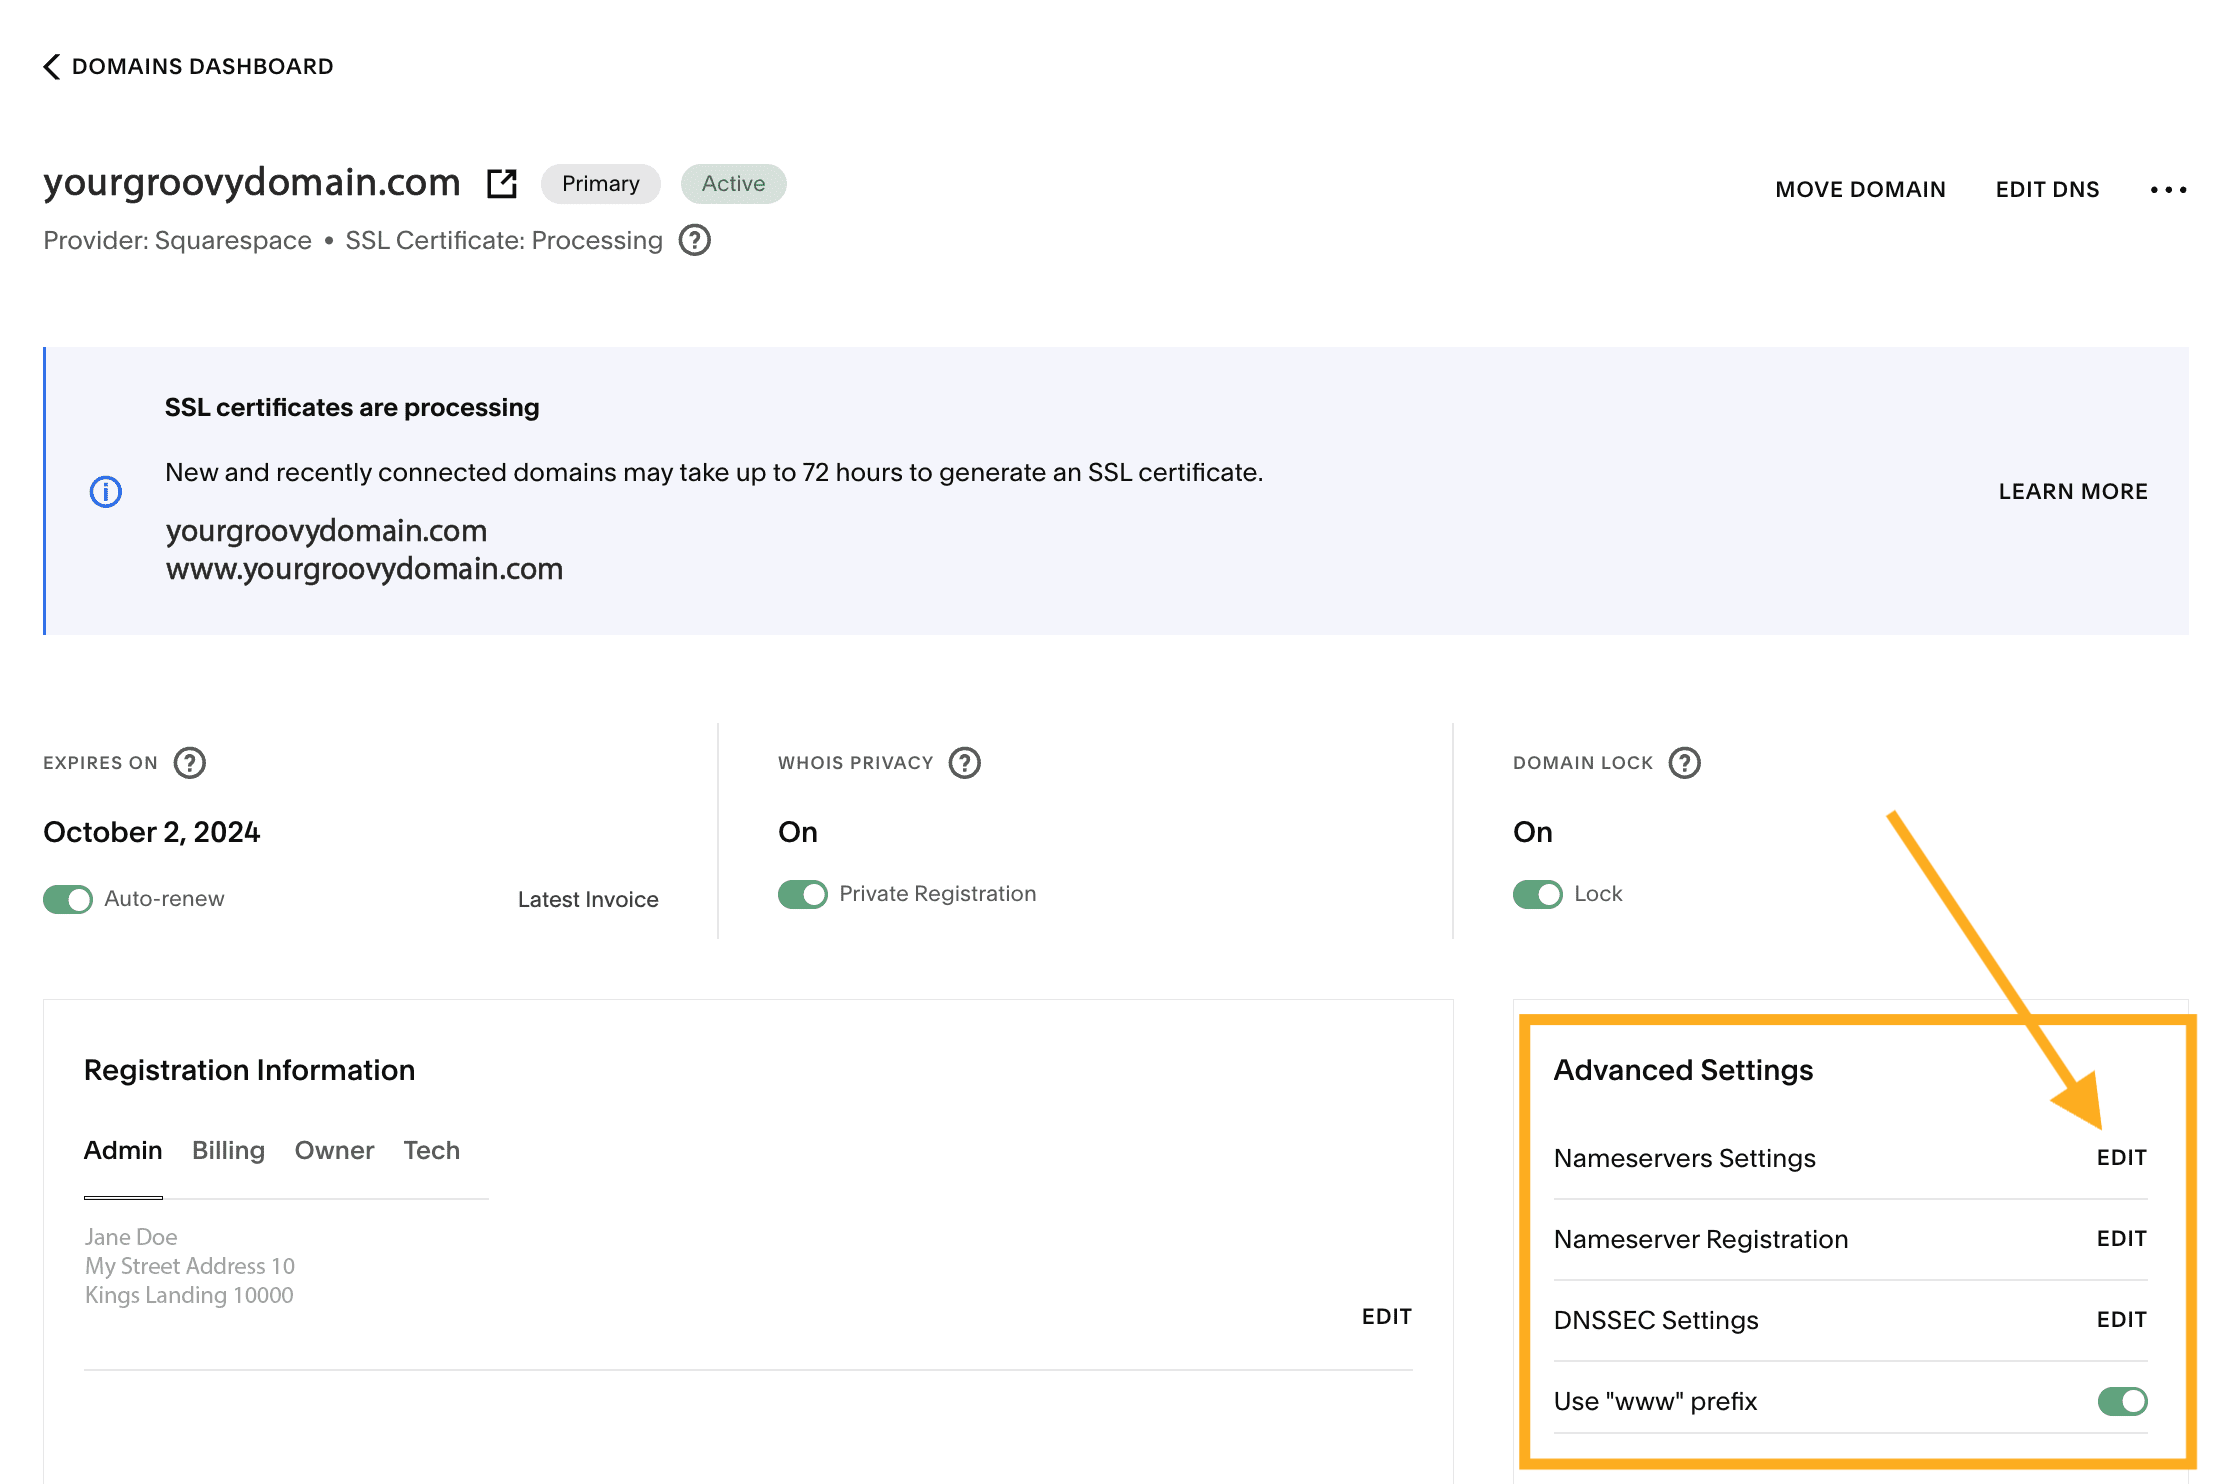
- Click the Edit button next to Nameservers from the Advanced Settings menu:
- Choose the “Use custom nameservers” option.
- Enter the new nameservers to connect your domain , just two in this case , remove the others:
NS1.DNS-PARKING.COM
NS2.DNS-PARKING.COM
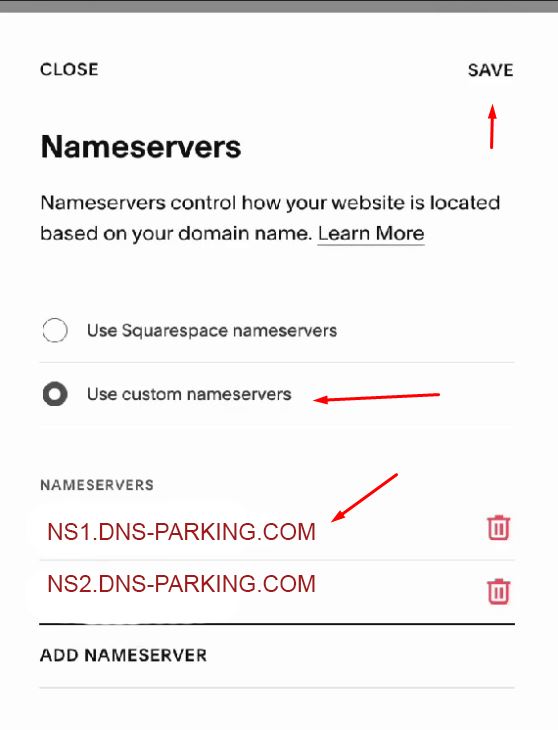
- Select Save to apply the changes.